TL;DR
- The average push notification opt-in rate is 67.5% overall — but iOS sits at just 54%, meaning nearly half of your iPhone users never receive a single push
- The default OS permission prompt is cold and context-free. Firing it on first app launch is the single biggest mistake apps make
- Pre-permission priming — showing a custom in-app nudge before the system prompt — can improve opt-in rates by 2-3x
- Timing matters more than copy. Trigger the ask after a value moment (first order, first save, first search result), not during onboarding
- Always include a “Not now” option. Users who feel pressured opt out permanently; users who choose “later” often opt in on the next trigger
- For users who already dismissed the prompt, use in-app nudges to guide them to re-enable notifications from device settings
- The best-performing apps treat opt-in as an ongoing campaign, not a one-time prompt
Why Push Notification Opt-In Rates Matter More Than You Think
Push notifications are the highest-converting re-engagement channel for mobile apps. They bring users back when they’re not in the app, drive time-sensitive actions, and keep your brand present in the notification tray alongside WhatsApp, Instagram, and Gmail.
But none of that matters if users don’t opt in.
Here’s the reality: the average push notification opt-in rate across mobile apps is around 67.5%. That number masks a significant platform split — Android opt-in rates sit at roughly 85%, while iOS hovers around 54%. For apps with a large iOS user base, that means nearly half the audience is unreachable via push from day one.
And the problem compounds. Users who dismiss the iOS system prompt are blocked permanently — the prompt cannot be shown again. The only path back is guiding users to manually toggle notifications on from device settings, which fewer than 5% ever do.
This makes the opt-in moment one of the highest-leverage interactions in your entire app. Get it right, and you unlock a direct, real-time channel to your users. Get it wrong, and you lose them permanently — no second chances.
The Problem With the Default Permission Prompt
Every mobile OS has a native permission prompt for push notifications. On iOS, it’s the familiar “App Name Would Like to Send You Notifications” dialog with “Allow” and “Don’t Allow” buttons. On Android 13+, it’s a similar runtime permission dialog.
These prompts have two fundamental problems:
1. Zero context. The system prompt doesn’t explain what notifications the user will receive, how often, or why they should care. It’s a binary yes/no with no value proposition.
2. Terrible timing. Most apps trigger the prompt during onboarding — the moment when users have the least understanding of the app’s value. They haven’t completed a transaction, explored a feature, or formed any habit. Asking for notification permissions at this stage is like asking someone to subscribe to a newsletter before they’ve read a single article.
The result? Users default to “Don’t Allow” because the risk (spam) outweighs the perceived benefit (unknown).
This is where pre-permission priming changes the game.
What is Pre-Permission Priming?
Pre-permission priming (also called a “soft ask” or “push primer”) is the practice of showing a custom in-app message before triggering the native OS permission dialog. This in-app message explains the value of enabling notifications and gives users a preview of what they’ll receive.
The flow works like this:
- User takes a meaningful action in the app (places an order, saves an item, completes a level)
- In-app nudge appears — a bottom sheet, modal, or tooltip explaining why notifications matter for this specific action
- User taps “Enable” → the native OS prompt is triggered
- User taps “Not now” → the nudge dismisses, and the OS prompt is never shown. You retain the ability to ask again later
This two-step pattern is powerful because it protects the irreversible system prompt. If a user isn’t ready, they dismiss your custom nudge (no harm done), and you can retry at a better moment. If they say yes to your nudge, they almost always say yes to the system prompt too — because they’ve already been convinced.
Apps using pre-permission priming consistently report 2-3x higher opt-in rates compared to firing the cold system prompt.
8 Strategies to Improve Push Notification Opt-In Rates
1. Time the Ask After a Value Moment
The single most impactful change you can make is when you ask.
Don’t ask during onboarding. Don’t ask on the splash screen. Don’t ask before the user has done anything.
Instead, trigger the opt-in prompt after the user has experienced value:
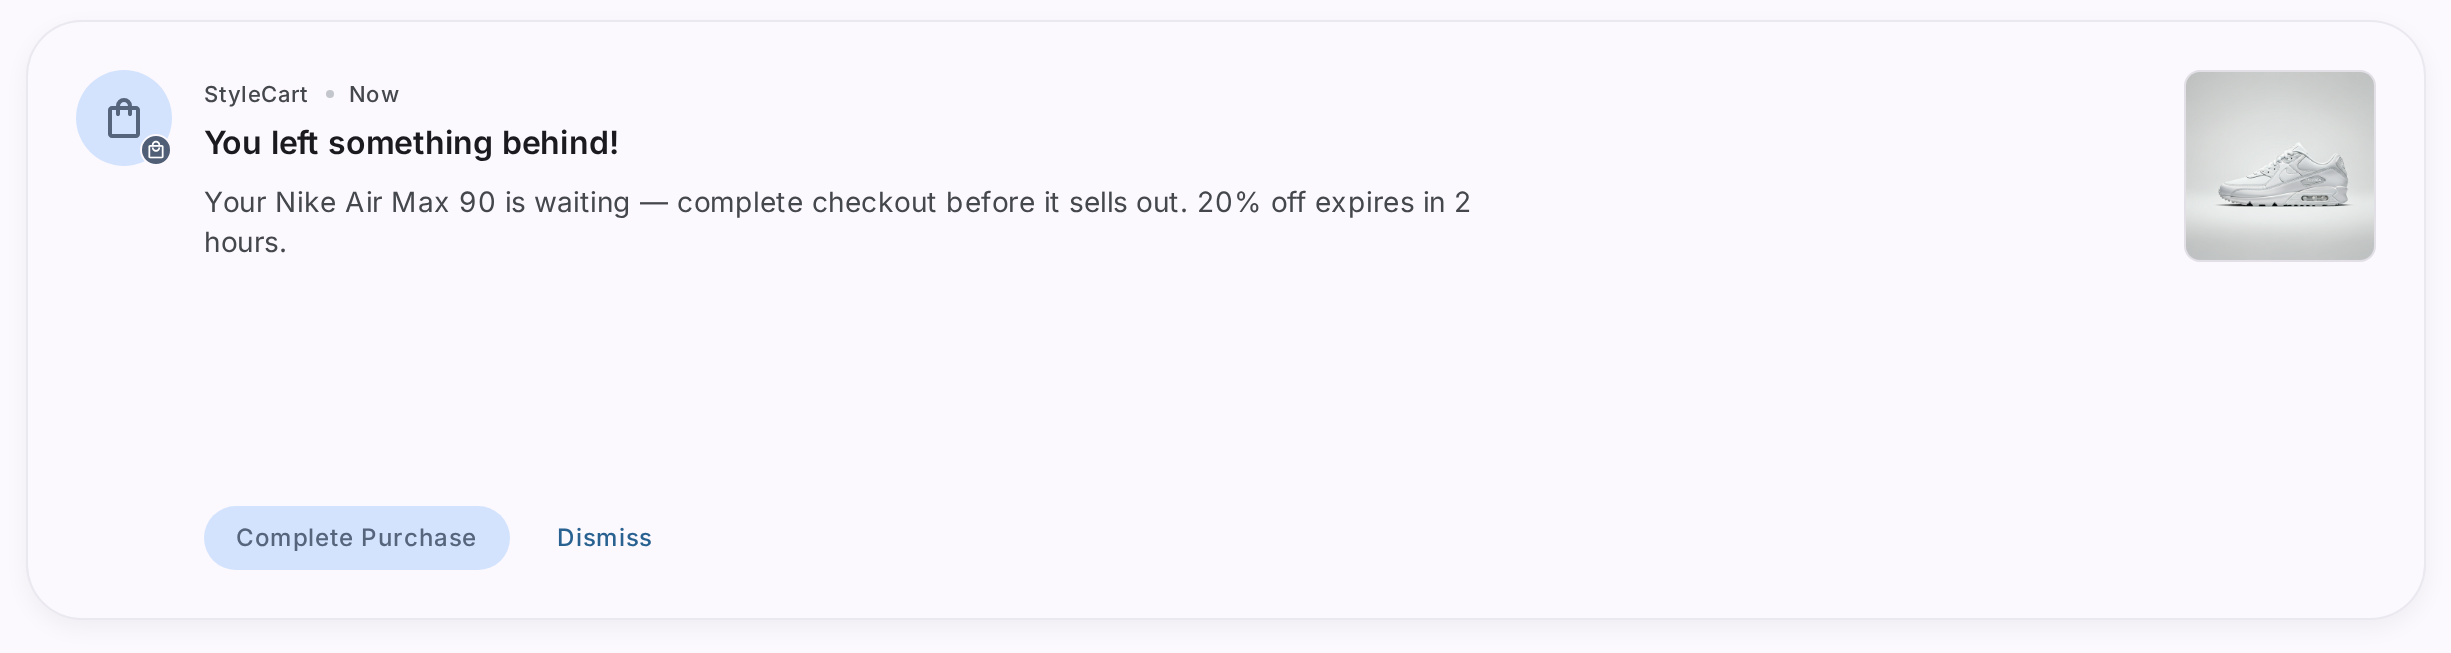
- E-commerce: After the user adds an item to their cart or completes their first purchase. “Want to know when this item goes on sale? Enable notifications to get price drop alerts.”
- Travel: After a user searches for flights or books a trip. “Get real-time flight updates, gate changes, and boarding reminders.”
- Fintech: After a UPI payment or a money transfer. “Never miss a payment update — enable notifications for instant transaction alerts.”
- Gaming: After completing a level or earning a reward. “Get notified when your daily bonus is ready.”
The principle is simple: ask when the user can immediately connect the value of notifications to something they just did.
Here’s an example — an e-commerce app showing a push opt-in nudge right after order confirmation, when the user’s motivation to track their package is at its peak:
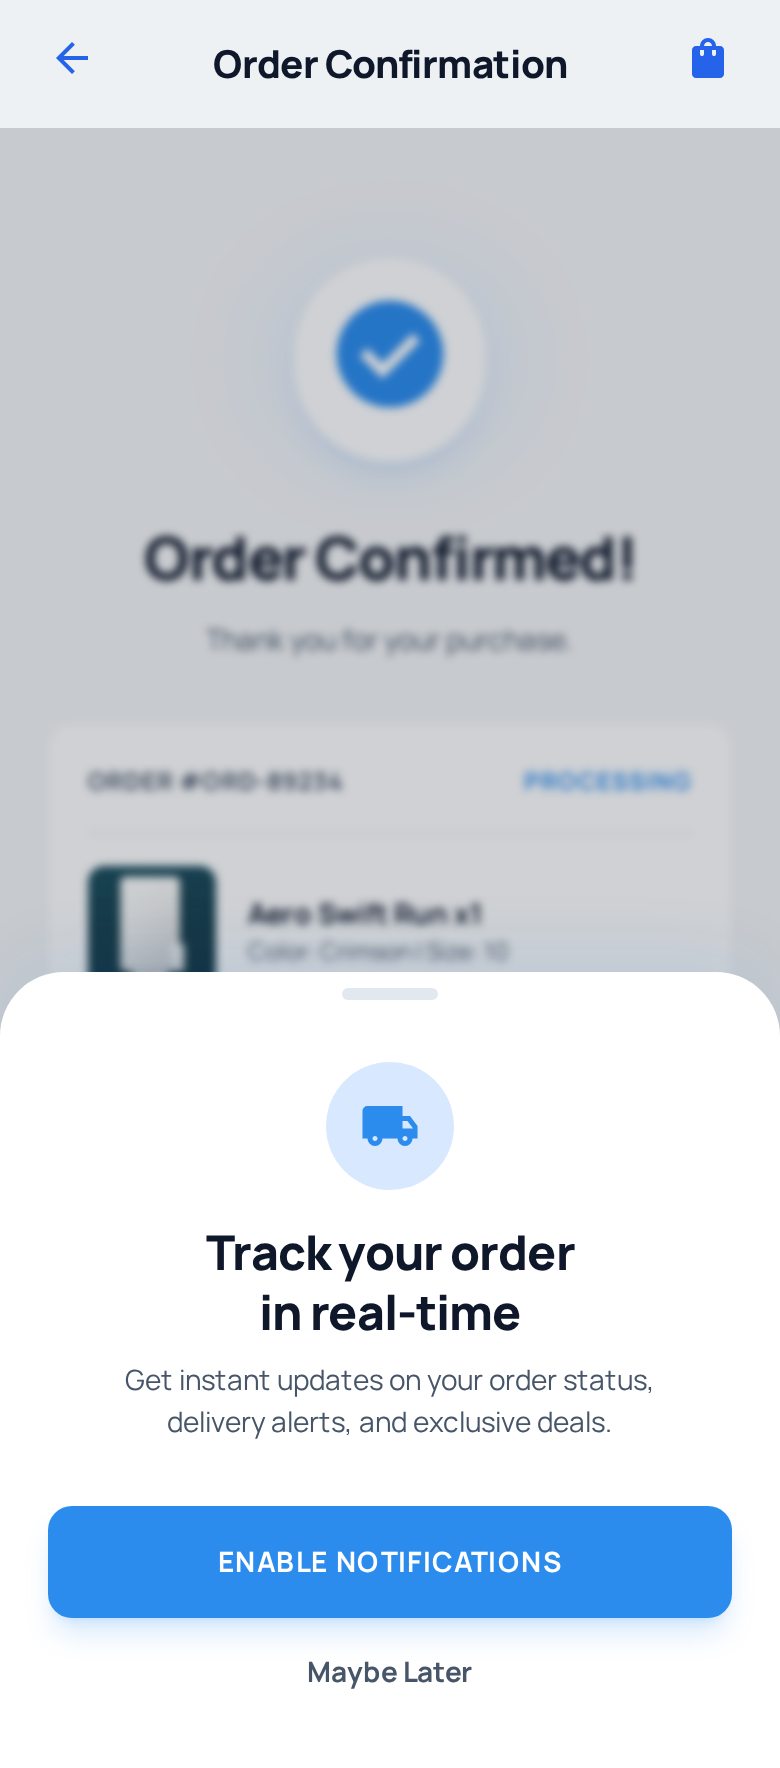
The timing is perfect: the user just placed an order and immediately understands why delivery notifications are valuable. The bottom sheet offers a clear “Enable notifications” CTA alongside a soft “Maybe later” dismiss.
2. Use a Custom In-App Nudge, Not Just the System Prompt
The system permission dialog is not your friend. It’s generic, it’s cold, and on iOS, it’s a one-shot opportunity.
Instead, build a custom pre-permission screen that:
- Explains the specific types of notifications the user will receive
- Shows examples of actual notifications (payment confirmations, order tracking, deal alerts)
- Includes a clear CTA (“Turn on notifications”) and a soft dismiss (“Skip for now”)
- Matches your app’s design language so it feels native, not like an interruption
Here’s how Ixigo does it — a clean bottom sheet that triggers on the home screen, explaining exactly what the user will get. This campaign was built with Plotline:
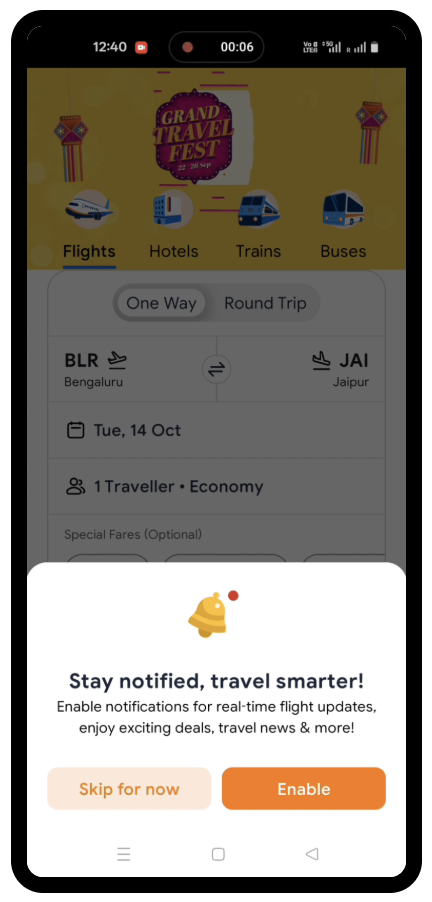
The copy is specific: “real-time flight updates, exciting deals, travel news & more” — not a vague “Allow notifications?” And the two-button design (“Skip for now” and “Enable”) gives the user control without creating pressure.
3. Make the Value Proposition Contextual and Specific
Generic opt-in messages like “Enable notifications to stay updated” perform poorly because they don’t answer the user’s real question: “What’s in it for me?”
The best-performing opt-in prompts are hyper-specific to the user’s current context:
| Context | Generic (Weak) | Contextual (Strong) |
|---|---|---|
| After first order | ”Turn on notifications" | "Track your order in real-time — get delivery updates, delays, and arrival alerts” |
| After saving an item | ”Allow notifications" | "We’ll notify you the moment this item drops in price” |
| After first deposit | ”Stay updated" | "Get instant alerts for every credit, debit, and reward on your account” |
| After a search | ”Enable notifications" | "Prices for Delhi → Goa change fast. Get alerts when fares drop” |
Look at how SalarySe does this — showing a clear value proposition tied to salary advances and payment reminders, the core reason users are in the app. This campaign was built with Plotline:
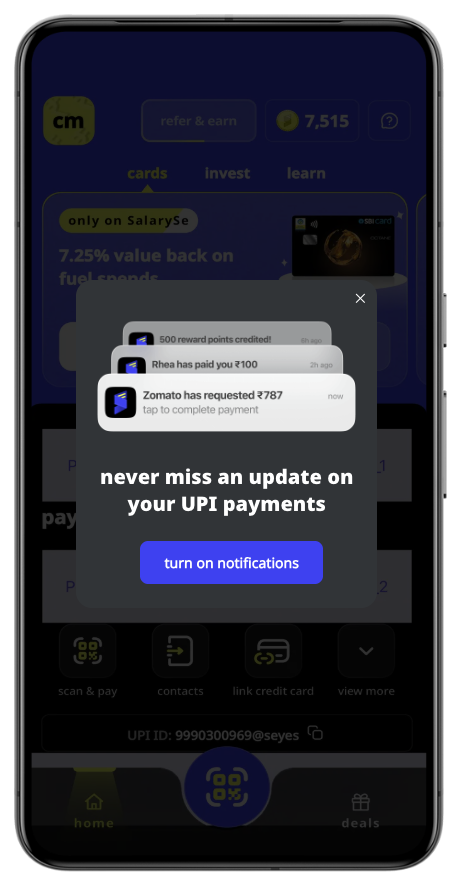
The messaging is directly tied to the user’s core use case — staying on top of salary advances, payment reminders, and account updates. By framing notifications around the specific value the user came to the app for, the opt-in feels like a natural next step rather than an interruption.
4. Always Include a “Not Now” Option
This might seem counterintuitive — why give users an easy way to say no?
Because the alternative is worse. If a user isn’t ready to opt in and your only options are “Allow” (via the system prompt) and “Don’t Allow” (also via the system prompt), a “Don’t Allow” is permanent on iOS. That user is gone forever.
A “Not now” or “Skip for now” button on your custom nudge:
- Preserves the system prompt for later use. The OS prompt was never triggered, so you can ask again
- Reduces negative sentiment. Users appreciate feeling in control
- Creates a re-engagement opportunity. You can show the nudge again at the next value moment, with different copy or after deeper engagement
The ideal pattern: show the opt-in nudge up to 3 times across different sessions, each time triggered by a different value moment. If the user hasn’t opted in after 3 attempts, back off and switch to less direct methods (like an in-app banner).
5. Re-Engage Users Who Already Dismissed the OS Prompt
Despite your best efforts, some users will reach the native OS prompt and tap “Don’t Allow.” On iOS, the game isn’t over — but the rules change.
You can’t show the system prompt again. But you can use in-app nudges to guide users to their device settings:
- Bottom sheets: Show a clear step-by-step guide: “To enable notifications, go to Settings → Notifications → [Your App] → Allow Notifications”
- Tooltips: Point to relevant in-app actions that would benefit from notifications, with a subtle prompt to enable them
- Settings page banner: Place a persistent (but dismissable) banner on your app’s settings or profile page
When to trigger these:
- When the user takes an action that would clearly benefit from push (e.g., placing an order, starting a streak, joining a live event)
- After a significant gap between sessions (they came back — reward that with value)
- When the user visits notification preferences or settings sections
Important: Don’t be aggressive. These users already said no once. The goal is to demonstrate value, not nag.
Here’s how a fintech app handles this — a bottom sheet that acknowledges notifications are off, explains the value, and provides a step-by-step visual guide to re-enable them:
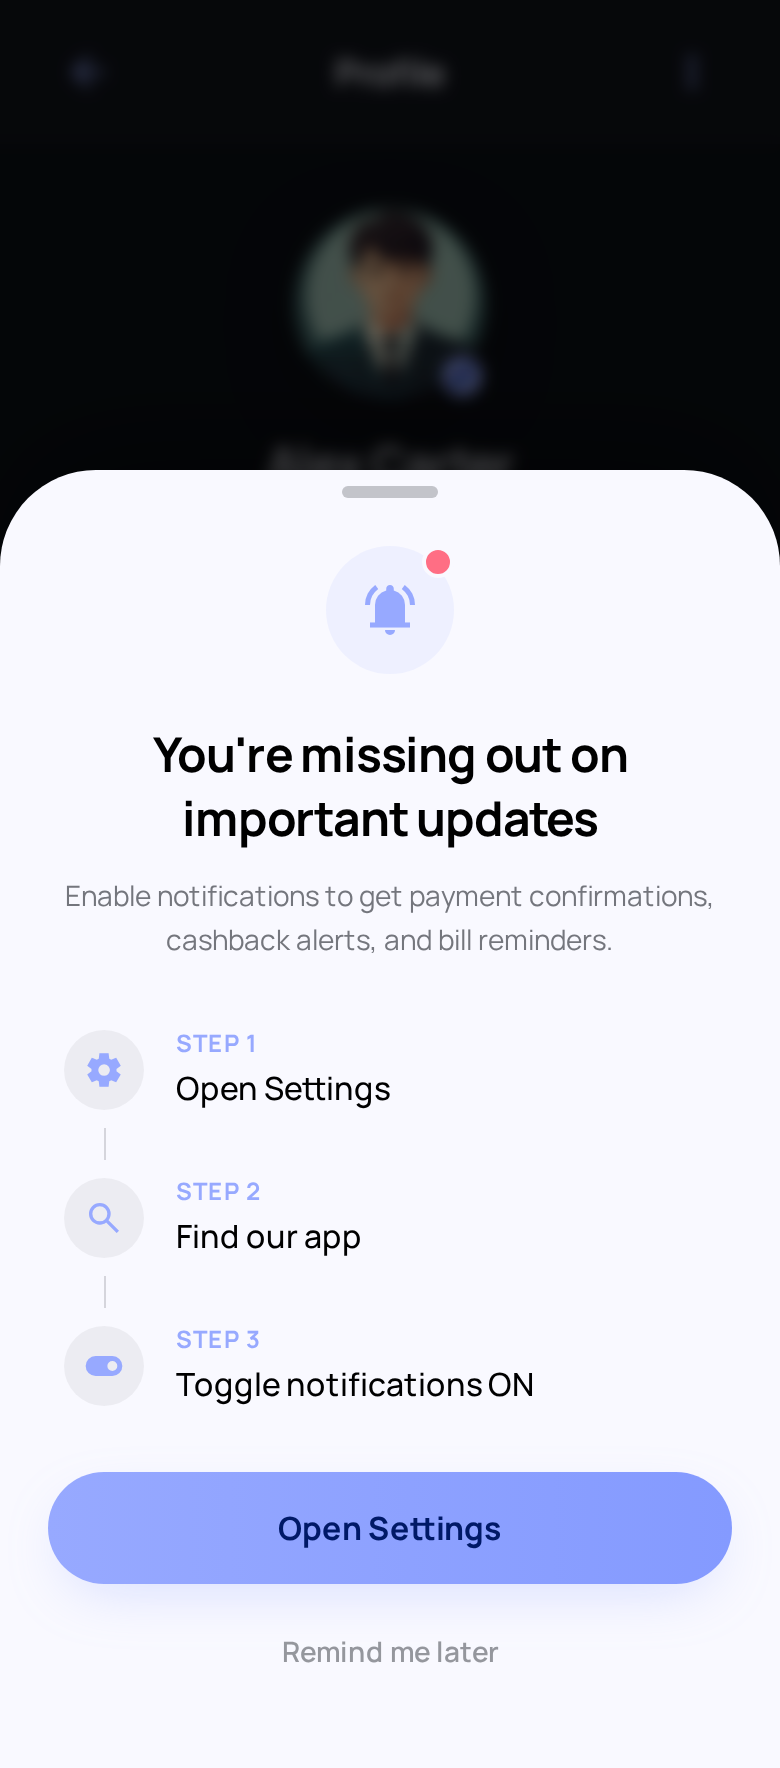
The three-step visual guide (Open Settings → Find App → Toggle ON) removes friction by showing users exactly what to do. The “Open Settings” CTA can deep-link directly to the app’s notification settings, reducing the steps further.
6. Segment Your Opt-In Strategy
Not all users are the same, and your opt-in strategy shouldn’t treat them that way.
By lifecycle stage:
- New users (Day 0-3): Wait for a value moment. Don’t prompt during onboarding
- Activated users (Day 3-14): These users have found value. This is the sweet spot for opt-in asks
- Power users: If they’re still not opted in, show the nudge tied to advanced features they actively use
- Returning dormant users: They came back — lead with what’s new and why notifications would help them stay current
By behavior:
- Users who’ve completed 3+ transactions are much more likely to opt in than first-time browsers
- Users who’ve engaged with promotions/deals respond well to “price drop alert” framing
- Users who’ve used search respond well to “get notified when results change” framing
By platform:
- Android: Opt-in rates are naturally higher (~85%), but Android 13+ now requires an explicit permission prompt. Don’t assume auto-opt-in
- iOS: Every opt-in is earned. Pre-permission priming is non-negotiable
Here’s how a gaming app targets power users — a tooltip anchored to the “Daily Bonus” feature, tying notifications directly to a reward the user already cares about:
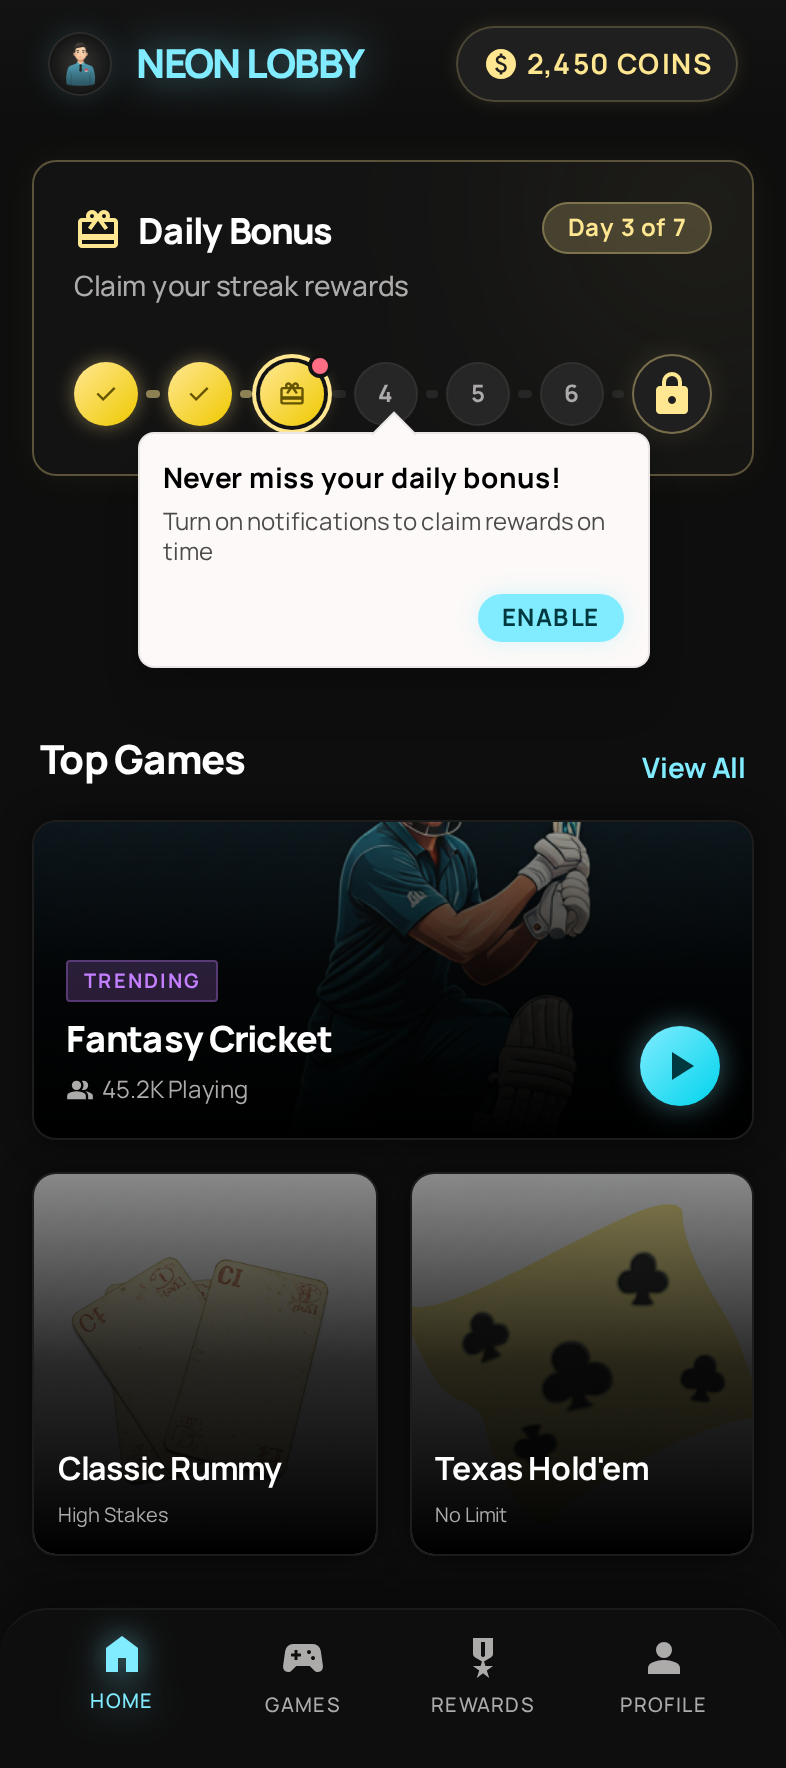
The tooltip is compact, contextual, and non-intrusive — it points to something the user is already engaging with and frames notifications as a way to never miss free rewards. This approach works because it meets the user where they already are, rather than interrupting them with a generic prompt.
7. Test Copy, Timing, and Design
The opt-in prompt is a conversion flow, and like any conversion flow, it should be A/B tested.
What to test:
- Copy variants: “Get notified” vs. “Turn on alerts” vs. “Never miss a deal” — emotional framing matters
- Timing trigger: After first action vs. after second session vs. after first purchase. Earlier isn’t always better
- Nudge format: Bottom sheet vs. modal vs. full-screen page pop. Test which format your users engage with most
- Visual design: With example notifications vs. without. Icon-heavy vs. text-heavy. Brand-colored CTA vs. neutral
- “Not now” wording: “Skip for now” vs. “Maybe later” vs. “Not now” — subtly different signals
Run each test with at least 95% statistical confidence before declaring a winner. Small improvements in opt-in rate compound — a 10% relative improvement means tens of thousands more reachable users over a quarter.
8. Make Push Opt-In Part of an Ongoing Journey, Not a One-Time Ask
The apps with the highest opt-in rates don’t treat opt-in as a single event. They weave it into the user journey across multiple touchpoints and sessions.
A sample push opt-in journey:
- Session 1: User signs up and explores the app. No opt-in prompt — let them discover value
- Session 2: User completes their first key action (purchase, booking, transfer). Trigger a contextual bottom sheet explaining notification benefits for that specific action
- Session 3 (if not opted in): User returns. Show a different nudge tied to a different value — e.g., “Your watchlist items are changing fast. Enable notifications to stay ahead”
- Session 5+ (if still not opted in): Back off from direct prompts. Use a subtle banner on the settings page or a tooltip near notification-worthy features
- Post opt-out recovery: For users who declined the OS prompt, show an in-app guide to re-enable notifications — but only when triggered by a high-intent action
This journey-based approach respects user autonomy while maximizing your chances across multiple sessions.
How In-App Nudges Drive Higher Opt-In Rates
In-app nudges are the connective tissue of an effective push opt-in strategy. They turn a cold, system-level permission request into a warm, contextual conversation.
Here’s why they work:
1. Context delivery. A bottom sheet can show sample notifications, explain frequency, and set expectations — all before the system prompt appears. The user makes an informed decision instead of a reflexive one.
2. Timing control. Unlike the system prompt (which apps often fire too early), in-app nudges can be triggered by specific events — a completed transaction, a saved item, a returned session. You control when the ask happens.
3. Preservation of the system prompt. If a user taps “Not now” on your custom nudge, the OS prompt is never triggered. This is critical on iOS, where a dismissed system prompt is permanent. The nudge acts as a protective buffer.
4. Design flexibility. System prompts are fixed — two buttons, standard copy, no branding. In-app nudges can be designed to match your app’s visual language, include illustrations, show preview notifications, and use persuasive copy that resonates with your specific audience.
5. Audience targeting. You can show different opt-in nudges to different user segments. A first-time buyer sees a delivery-tracking pitch. A power user sees a flash-sale-alerts pitch. A returning dormant user sees a “here’s what you missed” pitch. The system prompt is the same for everyone.
Formats that work best for push opt-in:
- Bottom sheets: The most popular format. Non-intrusive, easy to dismiss, enough space for context + CTA. The SalarySe and Ixigo examples above both use this format
- Modals: More assertive. Use for high-intent moments (post-purchase, post-booking) where the user expects a follow-up action
- Tooltips: Subtle. Point to a specific feature and explain how notifications enhance it. Best for power users who are already engaged but haven’t opted in
- Page pops / full-screen: Maximum impact, maximum friction. Reserve for the most compelling value propositions with strong visual content
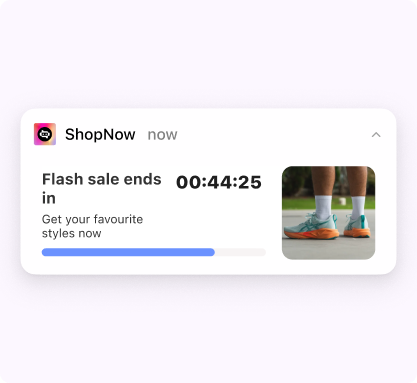
Here’s an example of a full-screen page pop for a food delivery app — maximum visual impact with a clear value proposition and benefit list:

The full-screen format gives room for an engaging illustration, three clear benefit rows (real-time tracking, flash deals, exclusive offers), and a prominent CTA — while still providing a subtle “I’ll do it later” exit for users who aren’t ready.
Key Metrics to Track
Improving opt-in rates requires measuring the right things:
- Raw opt-in rate: % of all users who have push notifications enabled. Your baseline metric
- Prompt-to-opt-in rate: % of users who see your pre-permission nudge and tap “Enable.” Measures nudge effectiveness independent of system prompt behavior
- System prompt acceptance rate: % of users who see the OS prompt and tap “Allow.” Should be 80%+ if your pre-permission priming is working
- Opt-in by cohort: Break down opt-in rates by install date, platform, and user segment to identify which groups need different strategies
- Time to opt-in: How many sessions (or days) between install and opt-in. Shorter isn’t always better — forced early opt-ins have higher opt-out rates later
- Opt-out rate: % of users who disable notifications after initially opting in. A rising opt-out rate signals content or frequency problems downstream
Getting Started
Push notification opt-in is a conversion problem, and like any conversion problem, it responds to better timing, better context, and better design.
The core playbook is straightforward:
- Never fire the system prompt cold — always use a pre-permission nudge first
- Time the ask after a value moment — not during onboarding
- Make the value specific — tell users exactly what notifications they’ll get and why
- Give users an out — “Not now” preserves your ability to ask again
- Treat opt-in as a journey — multiple touchpoints across sessions, not a single gate
The apps that nail push opt-in rates aren’t doing anything magical. They’re treating the permission request with the same rigor they apply to any other high-stakes conversion flow — research, design, testing, and iteration.
Start building in-app nudges that drive push opt-in — book a demo